DIY Seltzer, Club Soda, Soda, etc
While I’ve been on paternity leave I have increased the amount of club soda that I drink hugely. This is mostly because I wanted to have a refreshing beverage while in the non-air conditioned apartment. I did a little research and found out how to make my own so I could have as much as I wanted, and because Googling for how to do it was hard, I figured I’d document it clearly here.
🔗 What are we talking about here?
First off, soda: when I say soda I don’t mean Coca Cola, I mean club soda, though for most of this post I actually mean seltzer. Seltzer is simply water and carbon dioxide (CO₂.) Seltzer is actually a little harsh, so people add various salts (again, more on that later) to tone it down and taste more neutral. I really like club soda, but step one is to make seltzer.
🔗 Why Build a Carbonator?
There are a few reasons. One is cost. I’ll get into that more later, but at some point, building your own rig is going to be cheaper than buying. The bigger reason for me is that it is easier to make soda than to buy it. I live in Santa Monica and walk to the grocery store, so adding heavy or large bottles to my personal grocery cart is a drag. Also it’s always fun to make a thing instead of buying it.
🔗 Build it
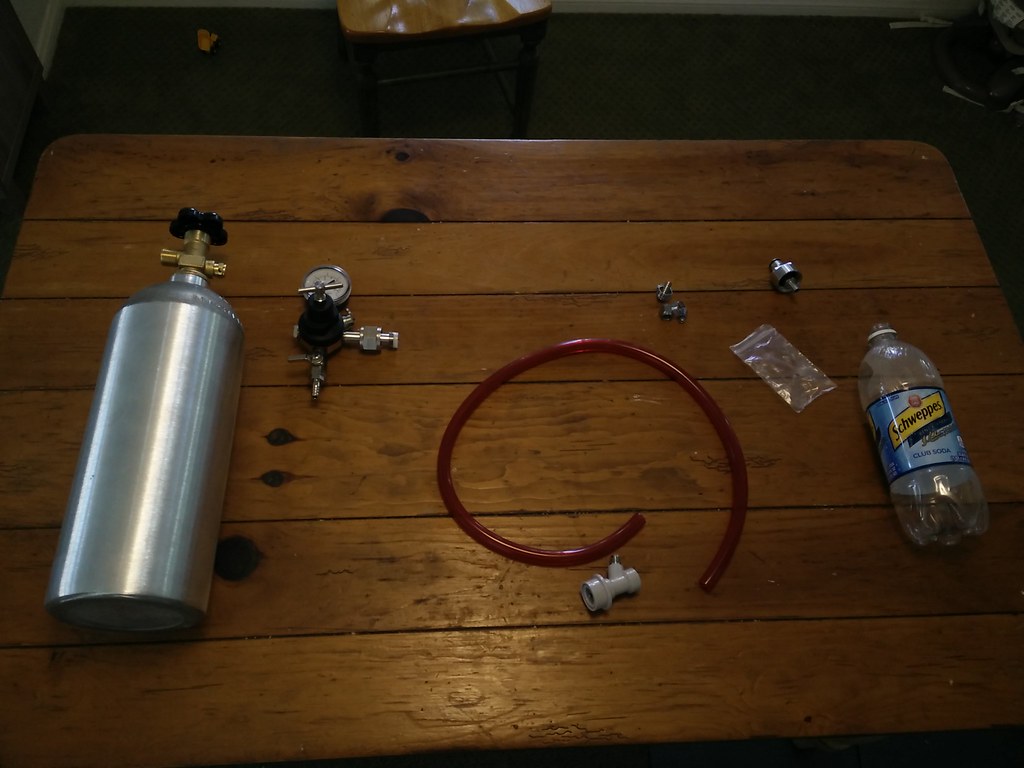
First off, here is a bill of materials:
🔗 Bill of Materials
(The following includes affiliate links.)
| Item | Cost |
|---|---|
| CO₂ Tank - 5lb |
$58 |
| Carbonation Cap |
$12 |
| Single Gauge Regulator |
$40 |
| Dual Gauge Regulator |
$47 |
| Gas Line Assembly |
$11 |
Total material cost: $121-$128
You only need one regulator, but the dual one will let you know when your tank is getting empty, so that might be nice to have. On the other hand it makes the full assembly much less compact, and I hear the other gauge tends to get broken since it sticks out so much.
There is one other cost that is recurring, and that’s the CO₂. I got my CO₂ at a homebrew supply store. People say you can get it at a welding store. I would have expected that to be unsafe but if Dave Arnold does it, it’s probably ok. At the homebrew store 5lb of CO₂ was $20. I saw all kinds of ranges for how far 5lb of CO₂ would go, the low was about 30 gallons and the high was 155 gallons, so I’m gonna use 100 gallons, or 378 liters. I suspect water might be more soluble than beer, which would imply that the CO₂ won’t go as far, but I was unable to find scientific studies backing up my belief (or more clearly they all used different units and none of the ranges overlapped and I am not interested enough to make a graph and extrapolate.) Links to papers on the truth here are very welcome.
🔗 Assemble the Carbonator
Putting together the carbonator is pretty easy. I took a bunch of pictures when I did it, but I’d be surprised if anyone felt like they needed them.
Tools you need:
| Tool | Cost |
|---|---|
| Flathead Screwdriver |
$6 |
| Big wrench or Pliers |
$16 |
I had these basic tools on hand, but you might not. A crescent wrench would work instead of the pliers but crescent wrenches are a big hassle so I avoid them. You’ll also need a bottle to put the soda in; I used a 1L bottle since my 2L bottle still has soda in it. As long as you can screw on the carbonator cap it should be fine.
First, put together the gas line assembly:
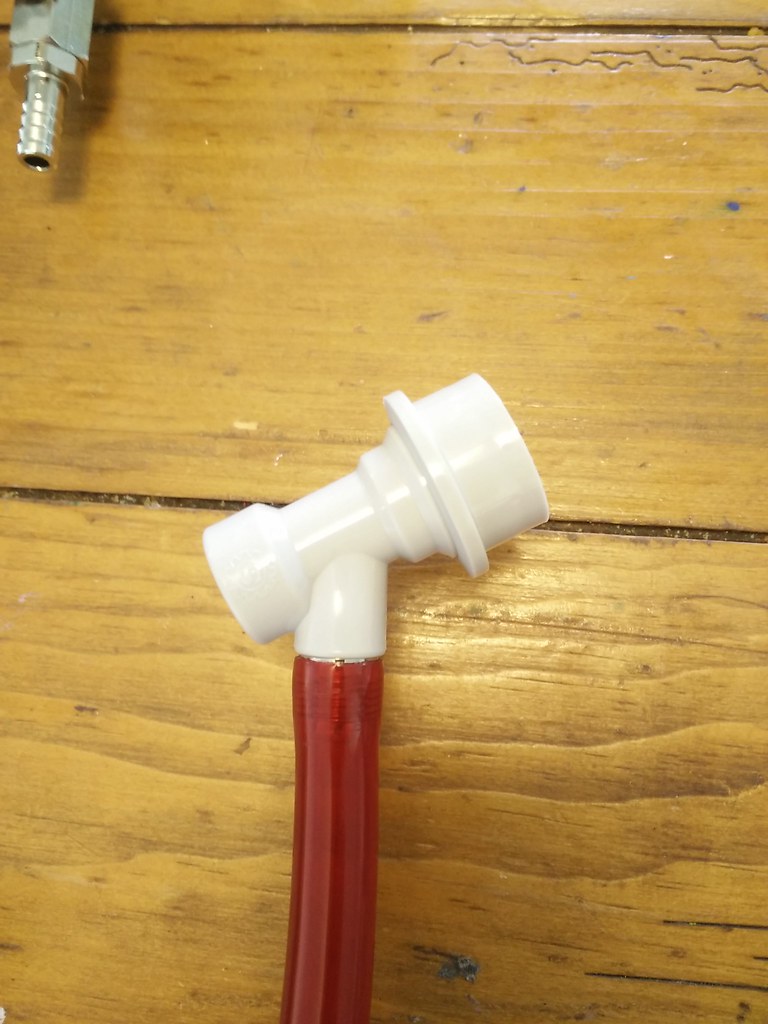
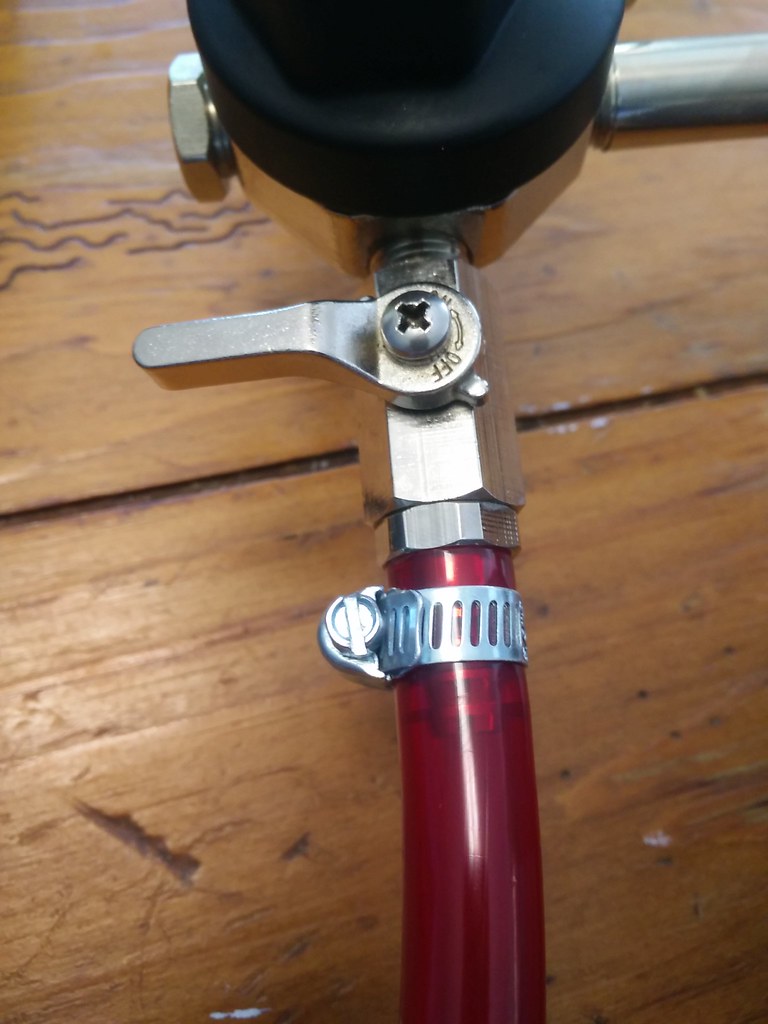
Use your screwdriver to tighten the clamp around the ball lock:
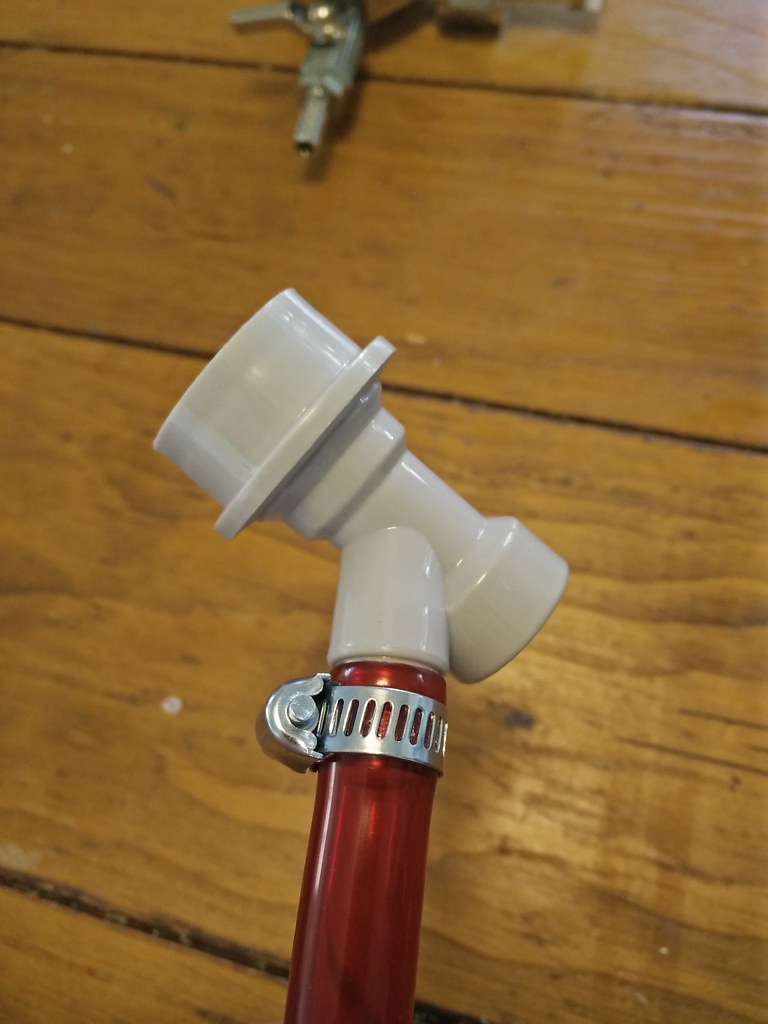
Next connect the gas line assembly to the regulator. Don’t forget to leave the clamp on before you connect it!
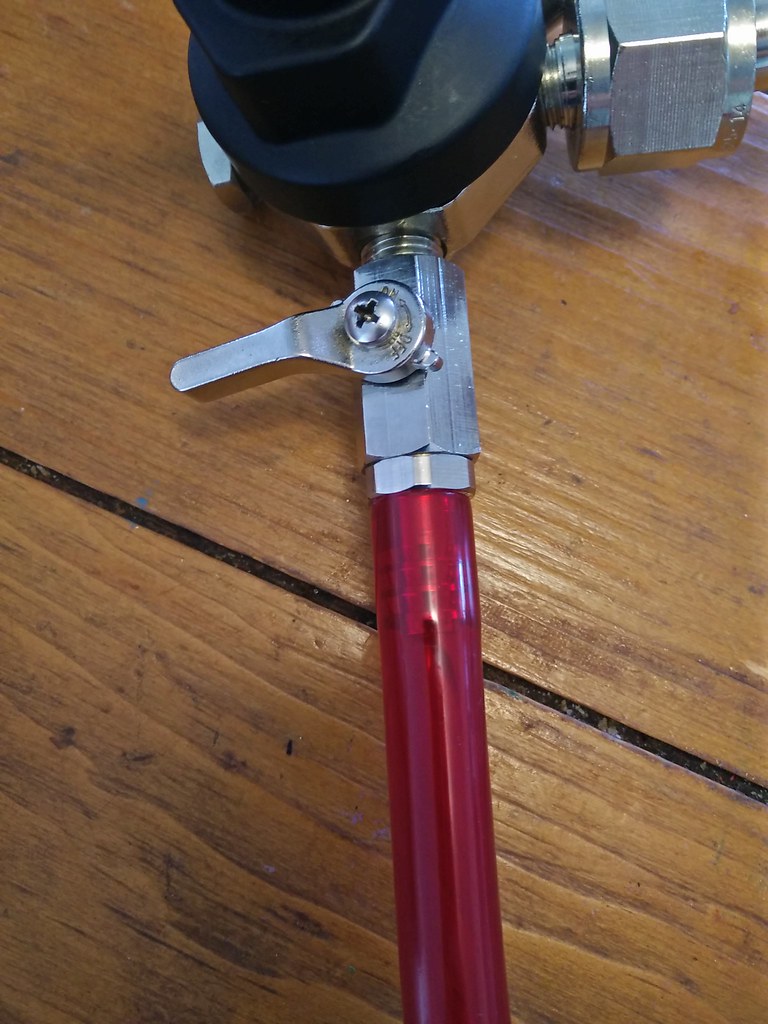
Tighten the clamp with your screwdriver from before:
Connect the regulator to the tank; you’ll need the wrench or pliers to tighten it sufficiently:

Follow instructions:
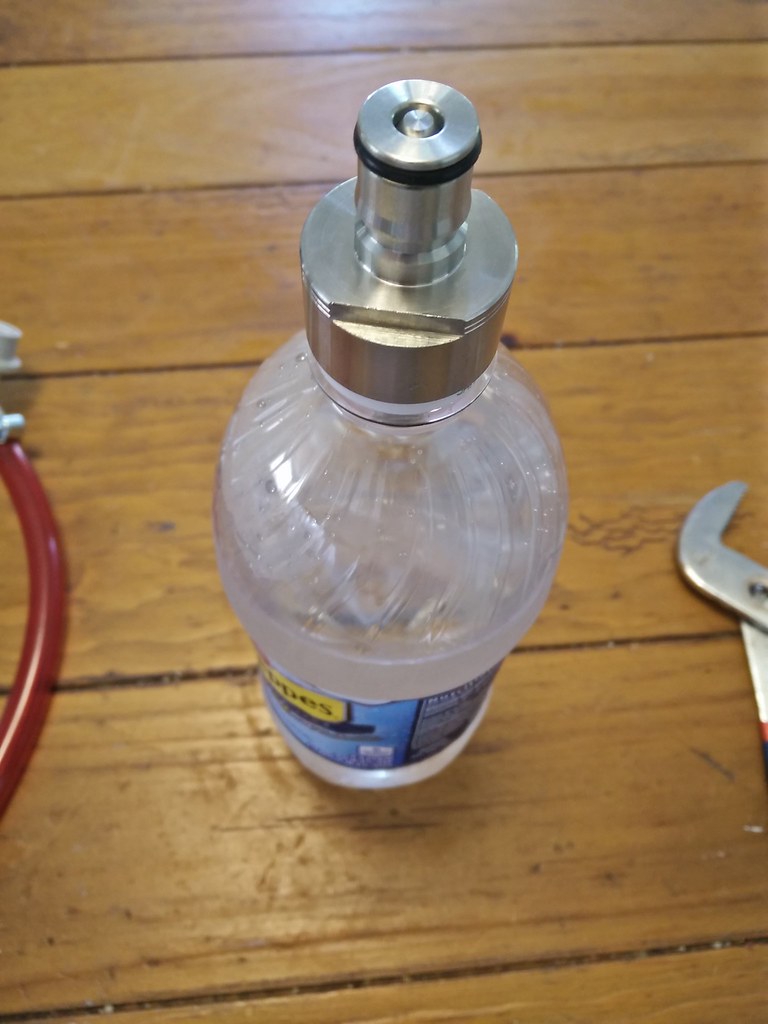
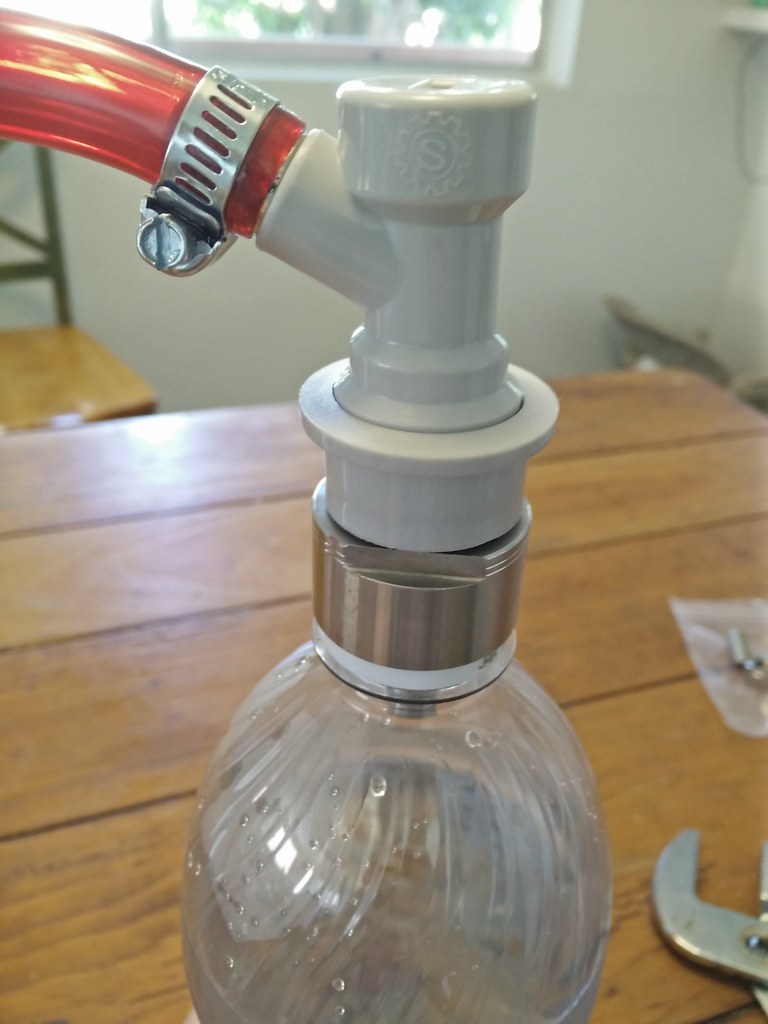
Screw on the carbonator cap:
Connect the gas line assembly to the carbonator cap. Pull back the ball lock:
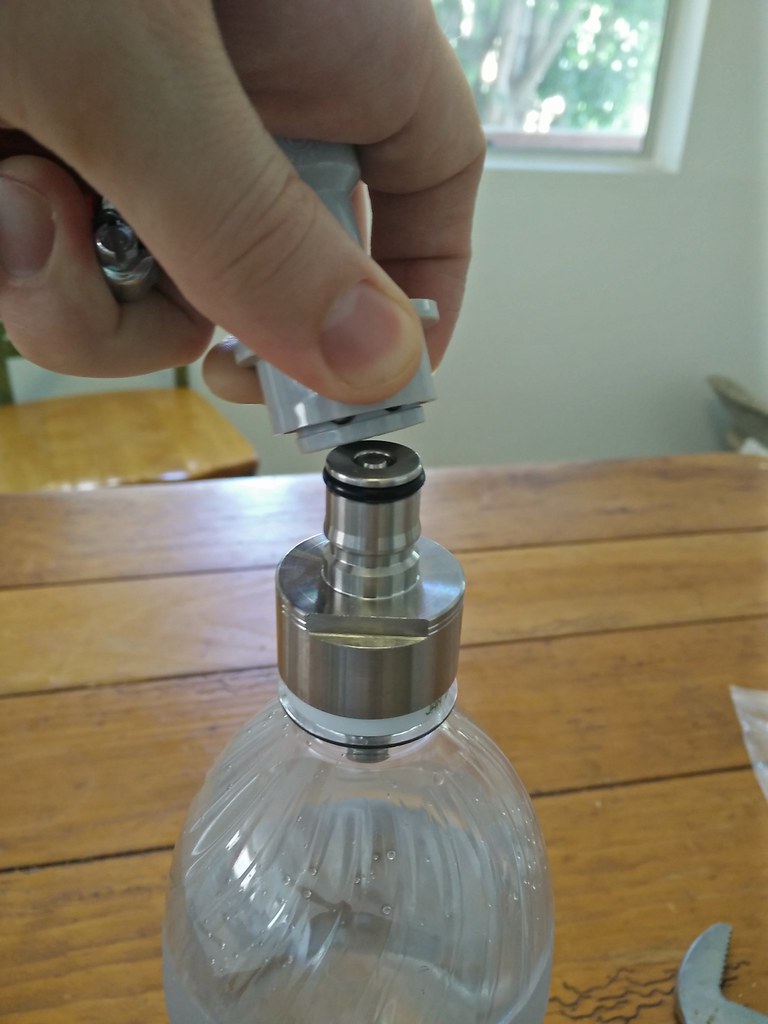
and push it onto the cap till it’s flush:
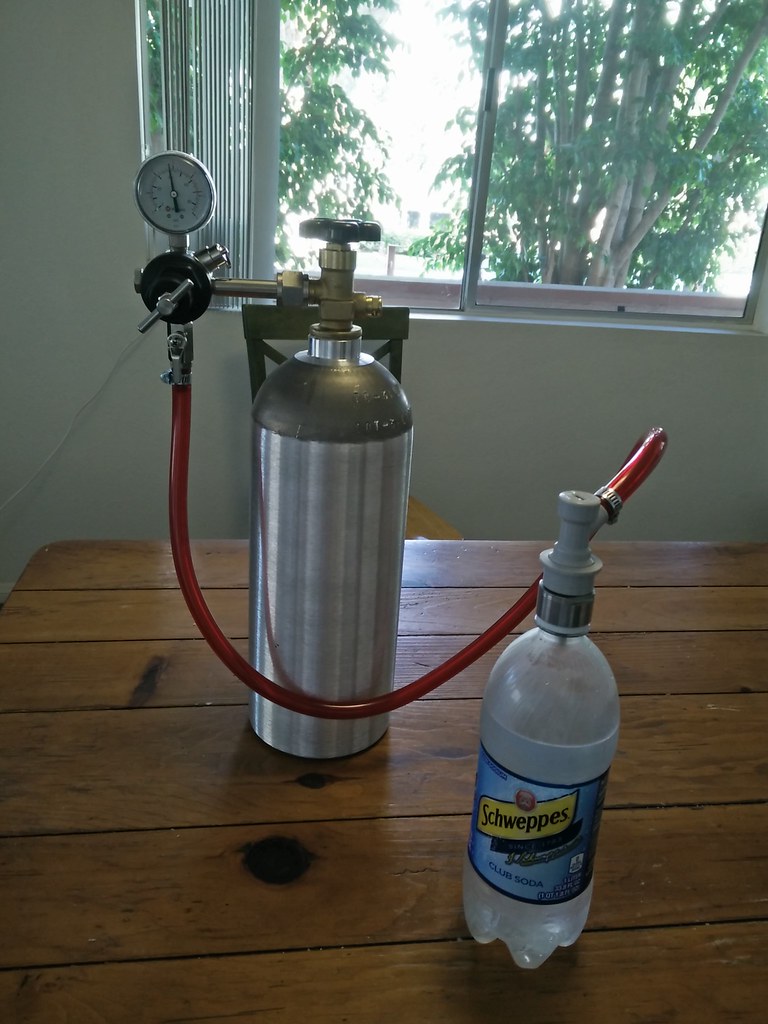
The complete assembly will look like this:
🔗 Make soda!
So that everything is abundantly clear, here is the assembly with labels:
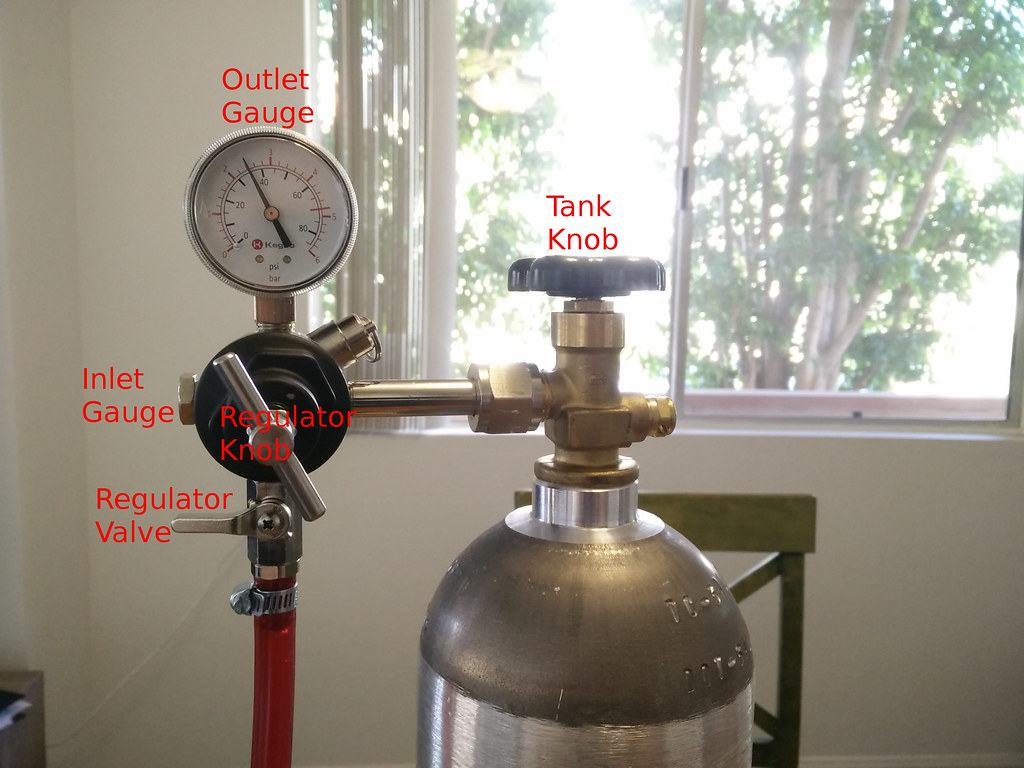
My system has no inlet gauge, but if it did, it would be where the label is. The inlet gauge measures how much CO₂ you have, and the outlet gauge measures how much pressure is in regulator. The tank knob opens the tank to the regulator, the regulator knob allows (a regulated amount of) pressure into the regulator, and the regulator valve allows the gas assembly (and thus the bottle) to be included in the regulator system.
I zero the system first so I know everything is normal.
- Make sure the tank knob is turned all the way tight (which is how I store my tank.)
- Connect the carbonator cap to the gas line assembly, but not screwed into a bottle.
- Open the valve at the bottom of the regulator. Now the outlet gauge should be at zero.
- Remove the carbonator cap and turn off the regulator valve.
So as I said before, I started with seltzer. All you need for this is water and a bottle. There is a relationship to water temperature, pressure, and the solubility of the CO₂. Or in layman’s terms: get the water good and cold, so that as much CO₂ as possible will go into the water. I put about a half a cup of crushed ice into the 1L bottle, filled it till it had a headroom of another half a cup of air, and then shook it till the ice melted. Prechilled water would be easier, less of a hassle, and if your ice maker is like mine: better tasting.
- Once you have the water ready, connect the bottle to the gas line assembly as explained in the last step above.
- Unscrew the tank knob a few turns.
- Open the regulator valve so that it’s in the on position (parallel with the
tube.)
- Turn the regulator knob till it’s showing 40 psi. This is confusing: you turn clockwise to increase pressure. The water should be pressurized now.
- Shake the bottle (I shook for about 30 seconds) to help get the CO₂ into the water.
- Turn the regulator valve back into the off position.
- Disconnect the carbonator cap from the gas line assembly.
- Replace the carbonator cap with a plastic cap.
- If you are only doing one bottle, close the tank knob.
- Enjoy your soda!
🔗 Cost Breakdown
I mentioned that cost could be a reason to do this. To justify it, here is the total cost breakdown and when this setup “pays for itself.”
Here’s the generic equation I came up with to solve for when it’s worth getting the carbonator:
amount of liters to break even =
      (upfront carbonator cost - other upfront cost       ) /
      (per liter other cost    - per liter carbonator cost)
| Type | Upfront Cost | Recurring Cost | Recurring Cost per Liter | Break Even |
|---|---|---|---|---|
| Carbonator | $121 | $20 / 5lb of CO₂ = 100 Gallons = 378 L | 5¢ | ∅ |
| Sodastream | $74 |
$64.44 / 180 L |
35¢ | 143 L = one refill |
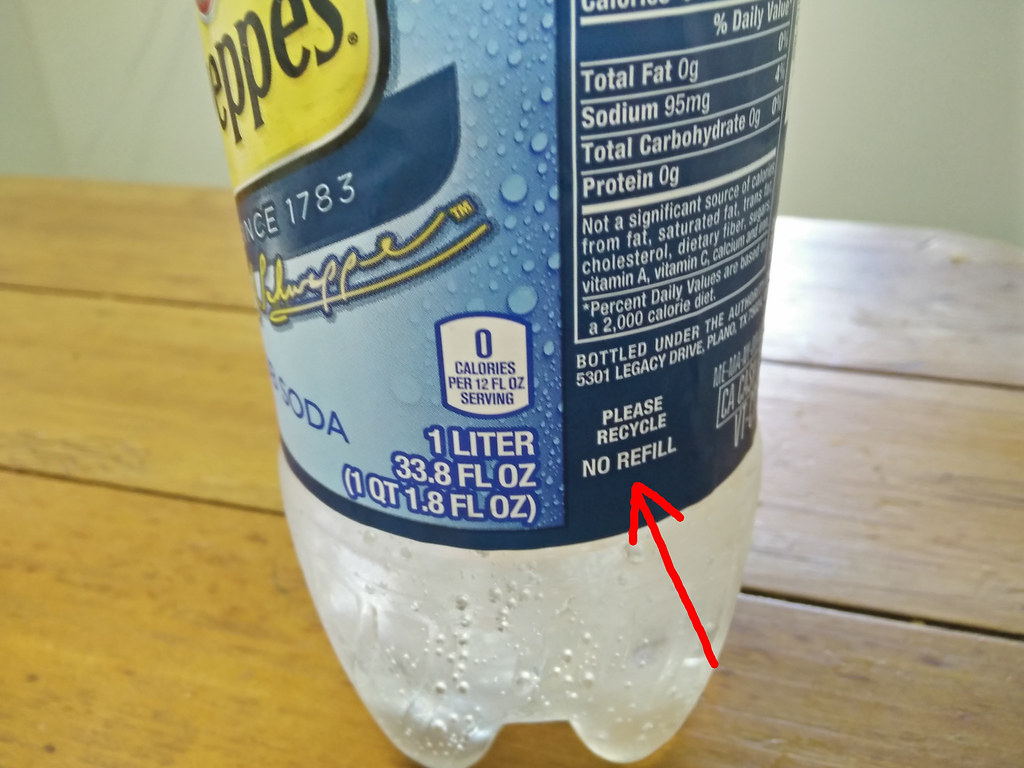
| Store brand | 0 | $2 / 12 pack 12 floz cans = 7.2 L | 27¢ | 550 L = 1550 cans = 129 twelve packs |
| Schwepps | 0 | $5 / 6 pack of 10 floz bottles = 1.8 L | $2.7 | 45 L = 152 bottles = 25 six packs |
| Q | 0 | $6 / 4 pack of 8 floz bottles = 0.9 L | $6.67 | 18 L = 76 bottles = 19 four packs |
Assumptions / Drawbacks: the fundamental premise above is that the soda you are making is equivalent to what you would be buying. For the store brand that’s pretty likely. With Schwepps I’m pretty confident that with a little effort you could get there. The Q stuff is likely much harder, though I haven’t spent a lot of effort trying to replicate it yet. If you are using a Sodastream you are almost sure to be making exact same product as the carbonator.
The other problem, ignoring the salts added, which is much of what differentiates the brands, is the water quality. When I use the filtered water from my fridge I get pretty good results. When I use the ice from my fridge I get noticeable off-flavors, which is a pretty big deal when it comes to something as subtly flavored as plain soda.
🔗 Next steps
🔗 Club Soda
The whole idea (and cost breakdown above!) is that I can make Club Soda with this. Typical club sodas contain varying amounts of:
- Sodium Bicarbonate (baking soda)
- Sodium Citrate
(you should have this on hand anyway)
- Sodium Chloride (salt)
- Sodium Phosphate
- Potassium Sulfate
- Other salts
I have read that you use 2 teaspoons of salt for 1 L of club soda, but I have not tested this yet. I will have a followup post with more detail on this, but in the meantime, this might get you started.
🔗 Shrubs
You don’t need to be able to carbonate a shrub directly in order to make a shrub, but it seems like a fun idea. If you don’t know what a shrub is, here are a few links on how to make them:
🔗 Gin and Tonics
Dave Arnold makes bottled Gin and Tonics with quinine sulfate, sugar, clarified lime juice, gin, and water, all carbonated in a bottle. I’d like to try that, but the clarified lime is too much right now (you need a centrifuge.) On top of that, for some reason tonic makes me nauseous nowadays, so I might try simply Gin and Club Soda.
🔗 Carbonated Chocolate Milk
One of my friends told me that he carbonated chocolate milk and really enjoyed that. It should be really easy to try. Another friend compared the idea to an egg cream, which I have not had so that’s not helpful to me, but maybe for you, dear reader.
🔗 More Typical Soda
I’d like to try to make a good root beer, since my wife and I drink it every Saturday in root beer floats, but I suspect that that is even more work than I have done just for the carbonator.
I also am interested in some basic sodas, like a lemongrass tea soda or a chamomile tea soda, or other simple beverages like that that are refreshing and interesting.
I hope this is as informative as anyone could want out of a post like this. I know it would have helped me. If you are interested in this, but not my more typical programming topics, you can check out the drinks tag and even subscribe to an rss feed just for that tag if that’s your jam.
🔗 Special Thanks
My friend C4 of Awesome Brewers, Great Job! was the one who gave me the initial bill of materials for this, and deserves a lot of credit for this happening. Thanks C4! Thee4!
🔗 See Also
- Jeffrey Morgenthaler’s How to Build Your Own Carbonation Rig
- CO₂ Solubility in Beer
- CO₂ Solubility in Water
If you're interested in being notified when new posts are published, you can subscribe here; you'll get an email once a week at the most.